| |
  |
|
 |
|
|
|
| |
The first quest ever to appear in AO, now on Arcanum
- better late than never, eh? Actually this quest, as far as quests go, is one
of the more extensive and also well-balanced there is as it pertains to all sides.
And if you haven't done it yet, you really should. |
|
|
|
|
|
|
 |
|
 |
 |
 |
| |
Happily running around with your first shoulderpads now? Let's kick it up a notch
and add some more juice to them with part 2 of this quest.
Head back to your secret agent of choice, Alvin or Dodga, and tell either that
you have something for them. You did save the card you got in
part 1 right? Good. Turning in the this card will clear you with the agents and
get you set up with the next part. You need to have the missions running to do
and complete this unlike for part 1, so be sure you are ready for it. The mission
has a one week timer on it, and if you don't complete it within the given time,
it will dissapear. Meaning you will have to do part 1 all over again to get a
new Card to initiate part 2.
 |
| |
 |
|
Alvins Card I
(Omni-Tek)
|
|
 |
|
Dodgas Card I
(Clan)
|
|
|
 |
It is apparen't that there's more going on with these robots than we thought, and
they might even have achieved artificial intelligence - and even further, might
even gather to pose a threat to man- and troxkind. In this mission we're out to
find the leader of this uprising and possible henchmen - some plain old intel
work to plan a proper counter-action.
In your inventory you'll find one piece of decoder equipment, and a stack of tracking
bugs. Since this is just intel, no fighting is involved. All you need to do is
bug these metallic suckers. The bugging is quite easy, but might cause a little
frustration as it could involve a little camping - not to mention the extensive
travelling involved. There are 9 robots in total we need to find, the leader and
it's 8 henchmen.
|
| |
 |
|
TK III Decoder
The gadget that collects all the data. You can use this on a bot to get
an idea where the next one is.
|
|
 |
|
Transmission Bug
Comes in a stack of 100, but isn't used in the actual planting.
|
|
|
|
The way to do this isn't as apparen't at first, but you really have to 'scout'
the robot in question before bugging them - done by simply being close enough
and then targeting them. After a few seconds you should hear a tune indicating
a mission complete, and the mission will change from "find person" to
"use on person/item". At this point, you have to bring out the Tracking
Bug and use one on the robot in question (pick up the stack from your inventory
and right-click the robot with the stack attached to the mousepointer). If done
right you will hear the mission complete indicator again and the mission in your
missionstab will change back to a "find person".
|
| |
 |
|
Find...
This icon will indicate the next order is to locate and target a certain
robot.
|
|
 |
|
Bug it!
Once located, the mission will change to this and means you now have to use the
bug on the bot.
|
|
|
|
It can be a bit tricky getting this right, and the mission description doesn't
really indicate how far you have progressed in the quest. The indicator here would
be that if you target one bot for a few seconds and nothing happens, you probably
got the last one wrong. Because order is of the utmost importance here - all bots
must be scouted and bugged in a distinct order. You cannot choose wich ones you
want to visit according to where you happen to find yourself.
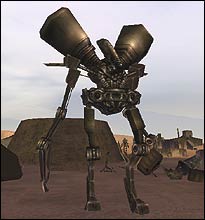
So let's get cracking. Luckily the hardest part is the first thing
you have to do, namely located the big bad leader of them all, the mighty Trash
King.
Trash is one giant mean looking hulk of metal that can send even the most persistant
Mole underground. He's also giving a few Engineers wet dreams we believe.
Trash rules the Junkyard outside West Athen (around 1600x1000) where his army
of little buzzsaws and technoscavengers mill about, and this is the place you'll
start your quest.
Don't be intimidated though, we just want a peak for now. This is not as easy
as it sounds as he's very sought after for exclusive interviews and a little something
to do with part 3 of this quest. |
|
 |
But alas, all we want for now is a peek, to report the findings and place a little
bug. This could be, under 'abnormal' circumstances, a hazardous task as he's quite
the angry robot. Under 'normal' circumstances though, this isn't a problem as
many others will certainly be around to engage him when he drops in, keeping you
out of harms way long enough to what you came here to do. Trash will most likely
be abscent when you arrive, so bite it and wait around until he comes to check
on his minions.
It is said Trash has a 20% chance of spawning every 20 minutes, making this very
sporadic. Sometimes you can be lucky and have him show up after a short while,
and sometimes hours on hours can pass by. When he does however, be ready. It is
likely others will engage him outright and it's important we can finish what we
came to do. Get close enough, within a couple meters, target him and wait for
the distinct mission complete sound. It's also a good idea to keep your missions
tab up at this point so you see you got it right. When the icon (above) changes
from the "find" to "use" one, bring out your Transmission
Bug and use it on him - done right, this will turn the mission icon back "find"
and there you go - the first and most time consuming part done.
 |
|
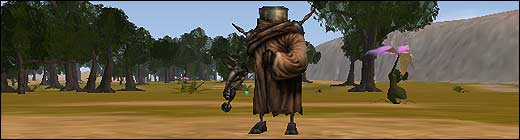
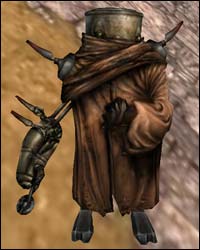
But don't leave just yet, there's one more thing
we need to do, and that's to bug one of Trash lackeys. In the time you waited
around for Trash, you've prolly seen these strange little robot creatures called
Trash King Lackey, so wait around until one spawns and do the
process again - target, wait, then place a bug. Note how these look like, as this
is what the other henchmen looks like too, small stocky cans with a bad temper.
Remember their grizzly appearance as the hunt for these is what will occupy you
for the next hours.
You'll also notice that when you completed the scouting and bugging of the Trash
King Lackey you recieved a token? That's right, one nice and shiny bravery
token (always worth 1 token). Except for Trash King, completing the scouting and
bugging procedure for the remaining eight bots will yield one bravery token. |
With Trash King and Trash King Lackey down, it's time to start the travels. Using
a Yalmah or other sort of flying transportation at this point is highly suggested
- flying around from a top perspective enables you to spot these a lot quicker
than on foot.
Next out is a lackey by the name of Electro Unique, found roaming
around in Wailing Wastes by 600x1300 - along the Boka crater rim or inside, this
one has a tendency to run around a lot, indeed you might find him running all
the way up to 600x2000 or down to 600x900, he is quite the outdoorsman... All
of these bots except the Trash King Lackey roam around a bit, so the coords listed
will not always be the place where you find them. The range isn't that long however,
and you should easily get a feel for the area they are bound by (by fences, mountain
ranges, lakes, crates etc). Scope around for a while around the coords, and if
you haven't found it by then, open your lunchbox and take a breather. Chances
are they had to go to the bathroom and will be back soon (everyone of the 8 lesser
bots will spawn in 20 minutes from the time they were killed).
Once you have Electro Unique tagged and bagged, we have to head to Wartorn Walley,
the small area just east of Old Athens. This zone can be reacher either by going
through the city and exiting through the east gates, or by flying around the city
walls to the other side if the local thugs eye you funnily. Roaming the far eastern
side of the Junkyard here, you'll find Nuts & Bolts (700x650).
- Next up is Greasy Joints, an ugly little thing found roaming
the desert north of Newland City (900x950), north of the big lake.
- Live Metal hangs out with a
lot of buzzsaws and junkbots around the "Bot
Mountain" in Greater Tir County and approximately
1500 x 2100.
- Moving further south into Omni-Tek territory, we'll find Best in Brass
meddling about just outside Rome Blue, in the area of Rome Stretch (400x800).
- At Harry's
Tradingpost just outside Omni-1 and in Lush Fields, on the norther shores around
the grid exit, Metalomania can be found (3000x3200).
- And last, Galvano can be found out in Greater Omni Forest,
circling a small mountain (2000x2300) for a completion of the tagging and a new
mission.
|
|
 |
|
Return to Alvin/Dodga
Credits: 40.000 - Exp: 40.000
First Update Syringe
1 Mission Token |
|
|
After the final bot is tagged, your mission icon will change and to your amazement,
small voices in your head will tell you to head back to the agents for the fame
and glory you deserve. Strike up a conversation with them as usual and tell them
you have something for them. Return the TK III Decoder and your mission
should finally complete.
In your inventory now should be a strange "Syringe" called a First
Update Syringe. Moving your shoulderpads from part 1 to your inventory and
using this syringe on the pads will update them to the second level.
|
| |
 |
|
Pads of Will
(Omni-Tek)
|
|
 |
|
Shoulderpads for the Learned
(Clan)
|
|
|
|
The second level pads builds on their previous stats and now adds 100 extra health
and nano, +12 to First Aid, and 45 to all Armor Classes, used in the right or
left shoulder slot. Requirements to wear are belonging to the appropriate side,
and being level 40 or higher.
Additionally, you will again be presented with a card. And if you didn't keep
your card from part 1 like we told you to, I'm sure you remember to keep this
one around now. As before, this card is needed to kick off part
3 of the grand shoulderpads quest.
|
| |
 |
|
Alvins Card II
(Omni-Tek)
|
|
 |
|
Dodgas Card II
(Clan)
|
|
|
|
Last updated 01. March 2004
|
|
 |
See what others have
said about this article, or post your
own comments regarding this in our
forums.
|
|
|
|
|
|
|
 |
|
 |
|
 |
|
|